Recovering From Bad Flashes
Mar. 7, 2024 [Technology] [Guides] [Libre] [Proprietary] [Hardware] [Privacy-Security]Whether you’re working with free or closed equipment, the underlying firmware can be a fragile beast. And neither are immune to the damages of human error. I’ll admit to putting my best foot forward on this site so I’m overdue to share some blunders which might serve as instructional material. Over the last couple weeks I had bricked some equipment in a bout of overconfidence. Some desktops and some routers each stricken down.
Brick #1
While repurposing a media center desktop for a good friend to use in their new home theater, I figured I’d take the opportunity with it all disassembled to reflash the latest firmware from the vendor. And, crucially, without reading the errata. Had I done so, I would have clearly seen their cautions:
*This BIOS doesn’t support Bristol Ridge CPU, do NOT update this BIOS if Bristol Ridge CPU is being used.
After the board went down to reboot, it returned with absolutely no video output. For a typical user, the only way out of this situation would have been to acquire a newer generation APU. But turning this thing around on the cheap precludes dropping money on a new processor (which would also enrich the backdoored x86 ecosystem). What to do?
Bring out the old SPI programmer! First things first, we want to locate the BIOS chip and get it hooked up. The board had a few likely candidates so we’d want to reference the layout. *Do I want this to be a BIOS flashing guide? Hell, the Coreboot guide can go in its own article!
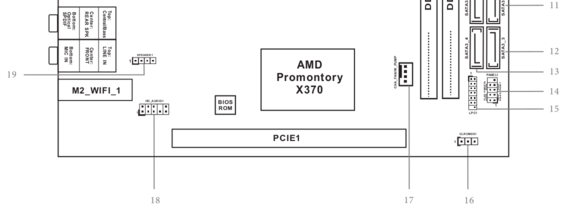
Normally, a BIOS chip would either be socketed or soldered in place. But with this particular X370 board, the vendor decided on a “socketed” Winbound chip of a style which should normally be soldered into place. It has it’s own enclosure that opens like box lids (seen right of the PCIe slot), revealing the loosely sitting chip.
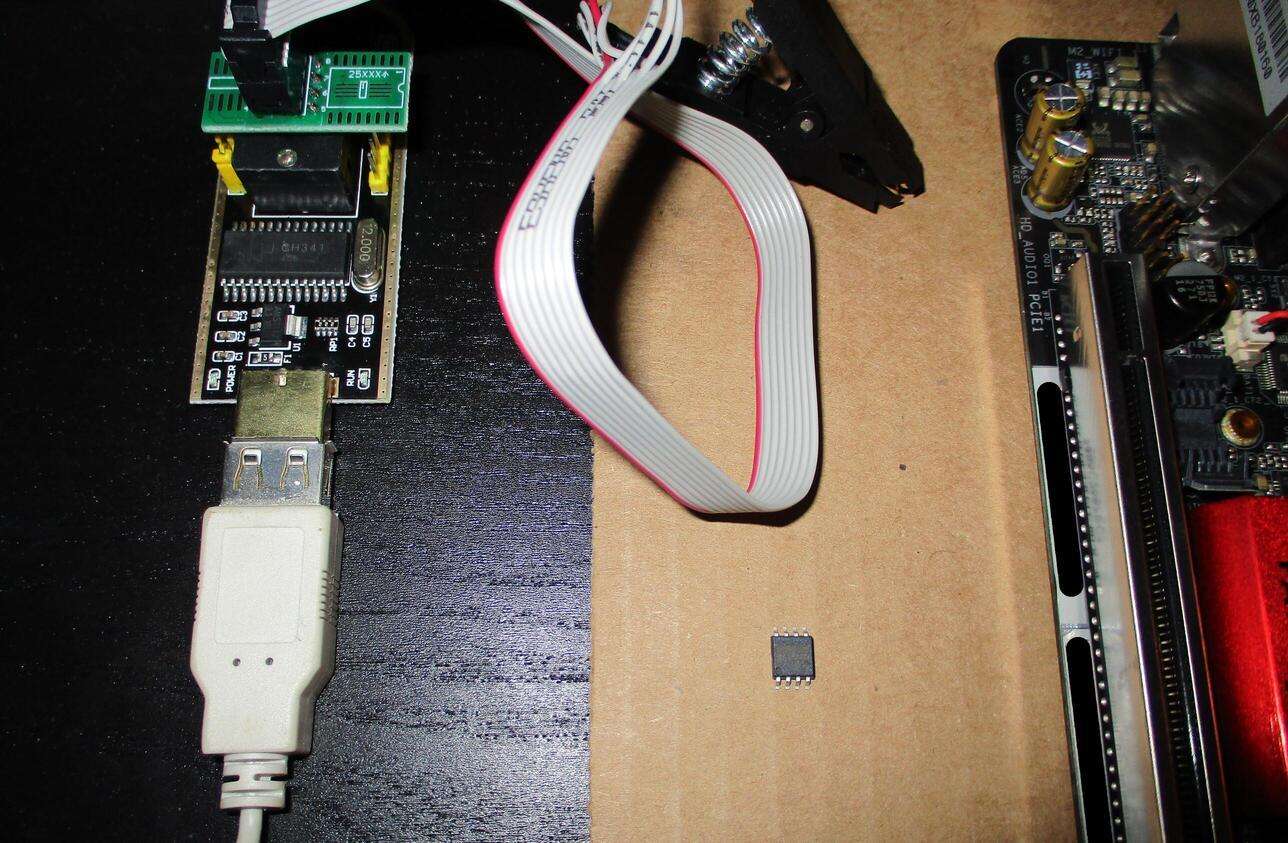
The clamp will need to be used for this unusual configuration, even though the chip is removable. If you haven’t used a SPI programmer before, look closely at the BIOS chip. There is typically a small circle in one corner indicating where to align the Pin 1 cable (red on mine).
With the programmer connected on a working host that has flashrom installed, we can issue a read command to backup the existing BIOS just in case the recovery attempt ends up making this worse somehow. flashrom generally needs to be run with root privileges.
flashrom -p ch341a_spi -r Firmware-Backups/x370-itx-backup.bin
Review the vendor’s support pages to identify and acquire the BIOS which actually supports the installed hardware. Extract it into a working directory.
wget --https-only https://download.asrock.com/BIOS/AM4/X370%20Gaming-ITXac(5.70)ROM.zip
unzip X370\ Gaming-ITXac\(5.70\)ROM.zip -d Working-Directory/
Issue a write of the firmware file to the chip.
flashrom -p ch341a_spi -w Working-Directory/X370GIA5.70
Output:
flashrom unknown on Linux 6.1.0-18-powerpc64le (ppc64le)
flashrom is free software get the sourcecode at https://flashrom.org

Using clock_gettime for delay loops (clk_id: 1, resolution: 1ns).
Found Winbound flash chip "W25Q128.W" (16384 kB, SPI) on ch341a_spi.
Reading old flash chip contents... done.
Erasing and writing flash chip... Erase/write done.
Verifying flash... VERIFIED.
Disconnect the SPI programmer and place the BIOS chip back into its socket. Then connect a power supply. The board can be powered on by shorting the PWR and GND pins on the system panel header. We find that all is now working again.
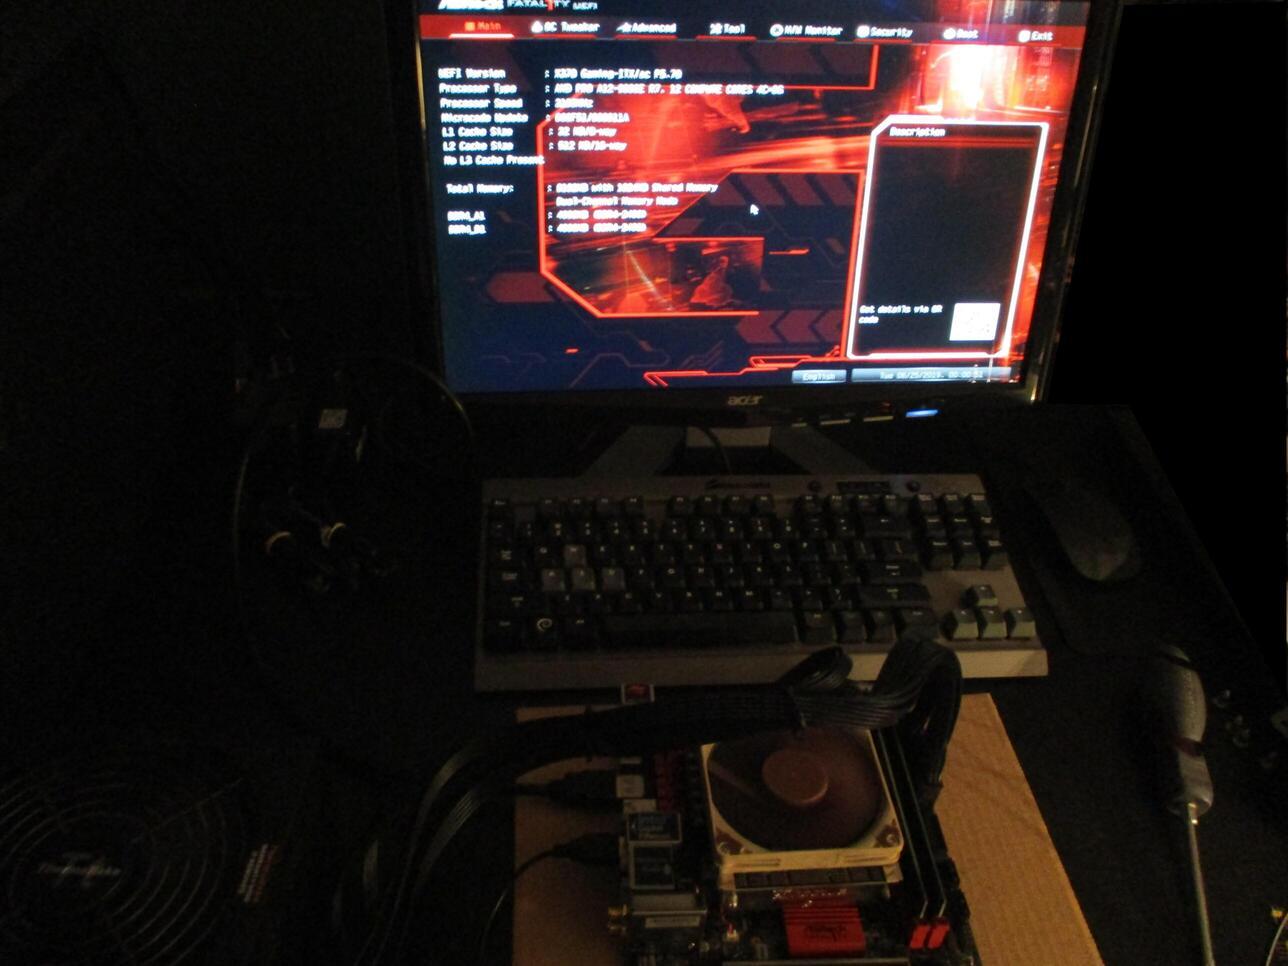
Granted the board is encumbered with a UEFI BIOS as there is no Coreboot port for it, and likely never will be. But at least the firmware is patched as far as it can be taken on the vendor’s disagreeable BIOS, including a fix for the F11 boot menu.
Brick #2
I had absentmindedly flashed one of my routers with the wrong OpenWRT image. The Netgear WNDR3400 retailed in three different revisions, v1, v2 and v3. They all look nearly identical except for the coloration of their illuminated domes. The internals of each revision are actually quite different. It was only a matter of time before my disorganization invited a WDNR3400v1 or WNDR3400v3 OpenWRT firmware to be flashed to my v2 model, thus bricking it. After it restarted it wouldn’t respond to any amount of network probing.
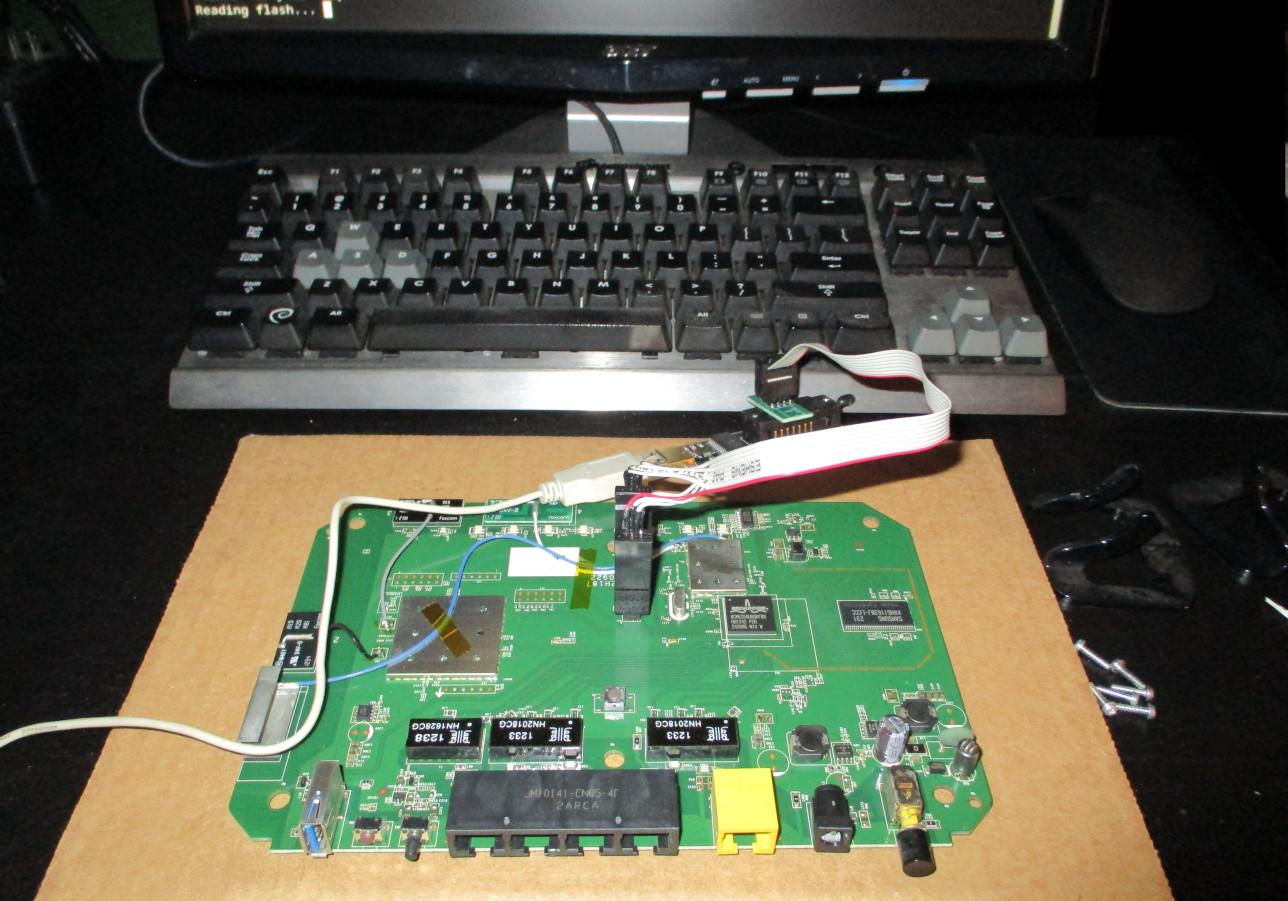
Backing up the current failed firmware was mostly smooth sailing. The specific model flash chip first needed to be passed with -c.
Using clock_gettime for delay loops (clk_id: 1, resolution: 1ns).
Found Macronix flash chip "MX25L6405" (8192 kB, SPI) on ch341a_spi.
Found Macronix flash chip "MX25L6405D" (8192 kB, SPI) on ch341a_spi.
Found Macronix flash chip "MX25L6406E/MX25L6408E" (8192 kB, SPI) on ch341a_spi.
Found Macronix flash chip "MX25L6436E/MX25L6445E/MX25L6465E/MX25L6473E/MX25L6473F" (8192 kB, SPI) on ch341a_spi.
Multiple flash chip definitions match the detected chip(s): "MX25L6405", "MX25L6405D", "MX25L6406E/MX25L6408E", "MX25L6436E/MX25L6445E/MX25L6465E/MX25L6473E/MX25L6473F"
Please specify which chip definition to use with the -c <chipname> option.
The model print is barely legible on the tiny flash chip.
flashrom --programmer ch341a_spi -c MX25L6406E/MX25L6408E -r Downloads/bricked-wndr3400v2--backup.bin
flashrom unknown on Linux 6.1.0-18-powerpc64le (ppc64le)
flashrom is free software, get the source code at https://flashrom.org

Using clock_gettime for delay loops (clk_id: 1, resolution: 1ns).
Found Macronix flash chip "MX25L6406E/MX25L6408E" (8192 kB, SPI) on ch341a_spi.
===
Reading flash... done.
I thought it would be a simple rescue with the programmer. But flashrom has an aversion to writing images that are a smaller size than the target flash chip capacity. And I didn’t want to force it since I couldn’t find any data on how flashrom pads space or whether it writes it to the beginning or the end of the ROM sector.
flashrom --programmer ch341a_spi -c MX25L6406E/MX25L6408E -w Downloads/openwrt-23.05.2-bcm47xx-mips74k-netgear_wndr3400-v2-squashfs.chk
...
===
Error: Image size (6230074 B) doesn't match the expected size (8388608 B)!
It didn’t take well to my manually padding the firmware image with truncate either for some reason. So I was sent looking for other solutions which led me to nmrpflash, a brilliant and minimal tool specifically for recovering from faulty Netgear firmware flashes.
Apparently, Netgear devices have their own “NetGear Management Remote Protocol”, or NMRP, which allows thier routers to automatically retrieve firmware images over TFTP, even in a failed state. Since the officially recommended installation method for OpenWRT on the 3400v2 is via the vendor’s original firmware, I determined to grab a copy for nmrpflash to supply. The host running nmrpflash needs to be connected to the router on its LAN1 port.
With the router powered on and connected, confirm that the ethernet interface is listed. (0.0.0.0 is valid here, and what I used to successfully recover the router):
nmrpflash -L
Then power off the router and start nmrpflash, passing the firmware file on that interface.
nmrpflash -i enP4p1s0f1 -f Netgear-Firmware/WNDR3400v2-V1.0.0.54_1.0.82.chk
Finally, power the router back on and wait.
The nmrpflash version in Debian’s repositories was unable to communicate with my WNDR3400v2. It would time out after a minute with “Timeout while waiting for TFTP_UL_REG”. So I begrudgingly built the newer v0.9.22 from source, which worked without any fuss.
Waiting for Ethernet connection (Ctrl-C to skip).
Advertising NMRP server on enP4p1s0f1 ... /
Received configuration request from XX:XX:XX:XX:XX:XX.
Sending configuration: 10.164.183.253/24.
Received upload request without filename.
Uploading WNDR3400v2-V1.0.0.54_1.0.82.chk ... OK (6713402 b)
Waiting for remote to respond.
Received keep-alive request (6).
Remote finished. Closing connection.
Reboot your device now.
Power cycle the router and a moment later it’s back up and usable. Now that looks much better!
Just get it back into its housing, rerun the OpenWRT flashing procedure and reapply the settings in LuCI web interface. jclehner’s tool leveraging NMRP was very helpful, but what does this mean from a security perspective?
There is an interface silently listening for ADVERTISE NMRP packets every time you power on a Netgear router even when the board firmware has been corrupted. As far as I can tell, TFTP uses no cryptography to secure file transfers and includes no login or access control mechanisms. In my time using it, the ethernet cable needed to be inserted specifically on LAN1 (next to the WAN port on most Netgear equipment) but this is no precaution I would seriously rely on.
The whole scheme just reeks of a liability on which to be running a public internet facing network. Maybe we need to start disconnecting such routers at the physical layer when applying firmware updates. It serves to illustrate how just because you’re running some replacement libre firmware doesn’t automatically put you in the clear.
Brick #3
One of my Coreboot systems received a bad build and, where I’d been relying on the internal programmer option from flashrom directly on that host, has no path to recover without hooking this one up as well to the external flasher. To be frank, I still have yet to recover that system, and it makes more sense to include that process in a wider Coreboot writeup. For the sake of keeping this short and digestible, I’ll conclude with this general advice when doing anything involving firmware:
- Double check file paths, command arguments, and image versions before committing to a firmware flash.
- Don’t initiate a firmware write without both the host and target connected on an uninterruptible power supply.
- Backup your firmware before reflashing anything, and consider keeping the backups for posterity.
- Read the damned changelog!